Hello Everyone,
Jannet here, I was a guest designer last year, and was lucky enough to be invited to join the Design Team!
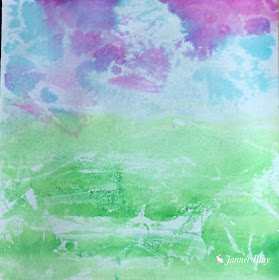
I have recently been playing with bleeding art tissue, so I thought I would share my discoveries with you.
It is an easy, quick technique which gives really nice results. It stains your hands very prettily too! (It washes off ok)
The first thing I discovered is not all tissue bleeds, the packet has to say "Bleeding Art Tissue" I found this pack quite inexpensively online.
I started by randomly tearing small pieces of tissue, and laid them on my card. I used 250gsm card, it did buckle a little when I went a bit mad with the spray bottle, otherwise it held up quite well.
I ended up with lots of different backgrounds, which I will use to create various pictures.
I added a fairy stamp and a dandelion stamp to create this scene. A generous sprinkling of glitter added some sparkle to the dandelions, and I also added some flowersoft to the flowers in her hair.
If you give this technique a try I hope you have fun, l would love to see the result.
Don't forget there is still time to enter the Winter Challenge with a Twist of Glitter


This is sooo COOL! Thanks so much for sharing this!!!
ReplyDeleteGorgeous project Jannet! Will give this technique a go.
ReplyDeleteWhat a fabulous technique, thank you so much for sharing it, love the fairy scene you created! Deb xo
ReplyDeleteAbsolutely gorgeous! I love everthing.
ReplyDelete