Showing posts with label distress ink. Show all posts

Wednesday, May 10, 2017

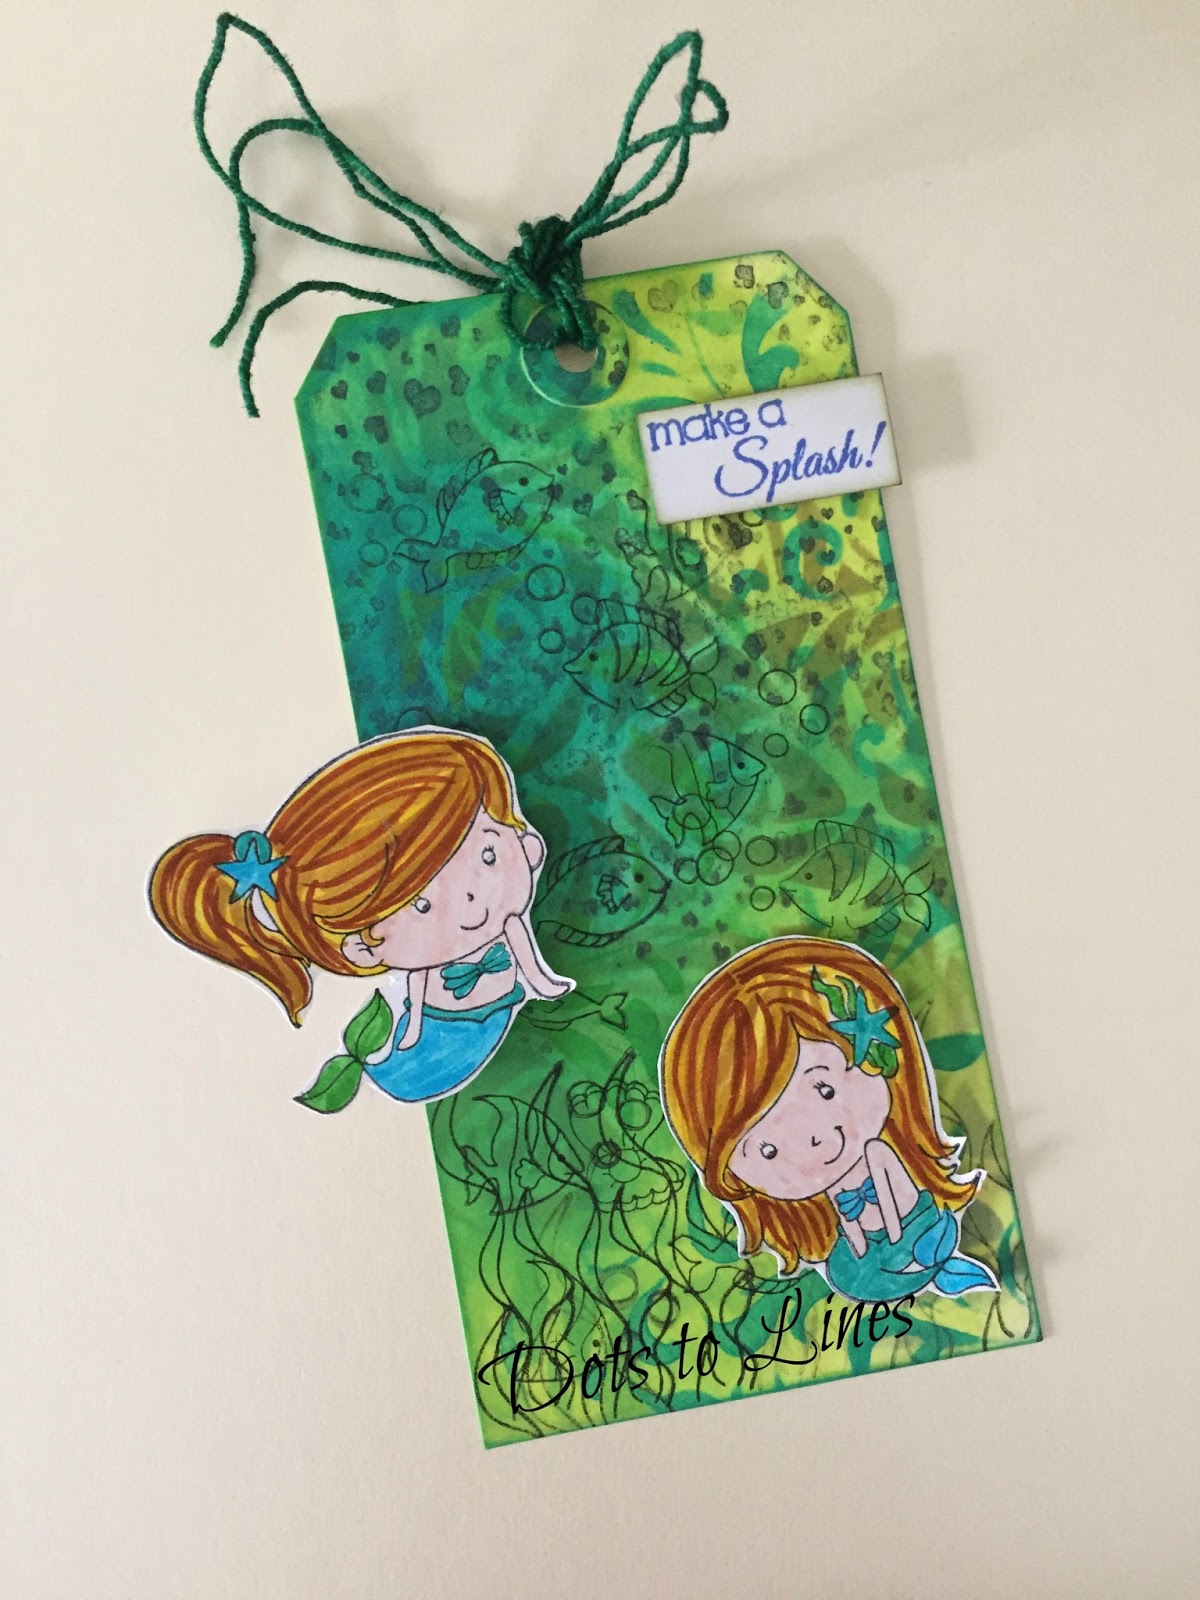
Tag tutorial

Hello everyone,

We're back today with an easy to make tag tutorial for you'll.

Before that did you check the ongoing challenge? Do check it out here.


Onto our tutorial now:

Supplies:

  • Manila Tag
  • Jet Black Archival Ink
  • Craftyscrappers- Raining Hearts and Mermaid Wishes
  • Dylusions- Fresh Lime, Vibrant Turquoise, Calypso Teal, Cut Grass
  • Tim Holtz Stencil- Flourish and Scribbles
  • Distress Ink- Peacock Feathers, Blueprint Sketch, Forest Moss
  • Zig markers


Step 1: Stamp using a background stamp and black archival ink onto your tag.


Step 2: Using Dylusions add colour on the tag, blending some shades on the tag.


Step 3: Use a stencil and stencil with Dylusions on the background


Step 4: Using distress inks and another stencil, add some more texture on the tag.

Step 5: Using a focal element stamp set, stamp on the background. Stamp focal elements on separate paper, colour and cut them. Then arrange them on the tag.


Add string/cord and your tag in complete!


Hope you're inspired to create and do participate in the ongoing challenge!
Regards,
Sunila & Aditi


Monday, May 8, 2017

Mixed Media Altered Canvas Tutorial

Hi everyone, I'm Christina.

Today I'm going to share with you the mixed media altered canvas I created, for this months challenge theme: Celebration with a twist Wedding.

Meet Pricilla. She's full of spirit and has a heart of gold....waiting for the man of her dreams. In the meantime you can see her all dolled up as she heads down the aisle with her abundance of flowers and glitter in her hair.

Let's get started......


Grab any size of canvas (I chose a 5x7) and cover it with Tim Holtz idea ology adhesive sheets, burlap. Then cover it with distress spray stain black soot. Heat set.


Next I used TH layered stencils, Industrial and Halloween with texture paste and let air dry. Once dried, apply distress inks Wilted Violet and Candied Apple on top.


Stamp image twice with Ranger archival ink - black on TH distress watercolour card stock (on the smooth side) and colour with various distress oxides and a h2o water brush.


Using TH mini snips, fussy cut "Pricilla" all the flowers and use pop ups for dimension. Add rhinestones in her hair and color them with an oil base marker. I used a copic marker. Doesn't she look pretty.....


Using a mini sponge tool and distress ink black soot, go over edges of stamp to make her pop out. The stamp I used is from Stampers Anonymous Day of the Dead 1.


For an added touch I used some of my favourite Tim Holtz idea ology finds - arrow adornment, skull (notice I added a couple rhinestones for the eyes with a little color for creepiness), metal corner.

I hope you enjoyed my tutorial and it leaves you feeling inspired.
There is still time left in the May challenge Celebration with a twist Wedding. We'd love to see what you create.

Have a great day,

Christina

Monday, March 20, 2017

Mixed Media Tag Tutorial

Hi everyone, I'm Christina.

As most of you know I'm a Tim Holtz addict! One of the many products I have is the ever popular Sizzix die The Lost Zombie. I knew when I received this die that there would be high hopes for him. You can switch it up for any occasion.

For the March Challenge I decided to create a mixed media tag using The Lost Zombie die.


Meet Rusty. He's got big plans! Tracking through the twigs, with a present and balloons. It's a bit windy, but it's not stopping him form enjoying the celebration.


After dressing the zombie, apply distress ink Walnut Stain around the edges for a tattered look.


Apply a thin coat of gesso to a #8 manilla tag. Let it air dry. It doesn't take long because there's not a lot of gesso on the tag.


Now the fun part begins....using any color of distress crayon, I used (Abandoned Coral and Vintage Photo) start colouring in random areas on the tag and blend with your fingers till the tag is covered. Hint: if the color is too dark, you can always buff it out with a baby wipe. Next place stencil (Dot Fade) on top and apply texture paste over in random areas of tag. Let it air dry.


Apply distress ink Broken China on top of Dot Fade, to give a hint of color.


For the zombie's (aka - Rusty) accessories I used Stampers Anonymous CraZy ThiNgs and the coordinating sizzix Framelits die, then coloured with distress crayons in Abandoned Coral, Feathered Peacock and Mermaid Lagoon.


This is one of my favourite dies - Sizzix thinlits die Twisted. It was used for the grass. 


The saying - Eat More Cake - is from the Stampers Anonymous - Handwritten Sentiments. I really enjoy playing with this set, because of the expressive lines.


Notice the brush strokes from colouring - it gives an effect of woodgrain in the background. It's pretty cool right?!

I hope you enjoyed my tutorial and if you want further inspiration check out the other talented design team members projects on this blog.

We want to see your creations for the March challenge: Birthday with a Twist Balloons. So, grab your tea/coffee, supplies out and use your imagination. The possibilities are endless!

Christina


Monday, July 11, 2016

Sea and Sky Art Journal Page

Hello, Deb here today to share an art journal page I made with our July challenge theme of Summertime with the twist of adding shells in mind.

I started out with a double page spread from my art journal.  I stamped some random background images along the bottom with a light colour of acrylic paint and then coloured the whole page with multiple colours of Distress inks in shades of blue.  The acrylic paint resists the Distress inks so that the stamped images still show.  I also discovered that I had some splotches of glue or medium on the page after applying the Distress ink but decided to just go with it!


Next, I made a 'wave' stencil from some acrylic packaging and coloured some waves onto my page with more Distress inks.  I then did some spritz and flick with water and dried it all.

More stenciling came next with a Tim Holtz Bubble stencil and a Southern Ridge Trading Company Net stencil in shades of blue Distress ink again.  I then spattered the page with Mermaid Lagoon Distress paint, white acrylic paint, Salty Ocean Distress stain and Heidi Swap White Color Shine.


I wrote the lyrics to a Dusty Springfield song around the edges of the page with a black Pigma Micron pen (the song is called Sea and Sky).  I added some collaged images, a piece of cheesecloth stained with green Distress ink and then stamped and clear embossed Tim Holtz's Compass Blueprint stamp and a quote from his Life Quotes stamp set.

Here are some closer shots of the clear embossed stamps.


 I added a small Mirrored Star colored with alcohol ink to the center of the compass image.

The collaged images were cut from a book I had in my stash, I added a small star and a mermaid charm (both coloured with alcohol inks) to the tall ship tag.


I shaded around all of the collaged images with Vintage Photo and Mermaid Lagoon Distress crayon.

And to complete the page, I added some real shells to each bottom corner.  I added some twine under the shells on the left hand corner,


and added more mirrored stars coloured with alcohol inks to each shell cluster.  You can also just see some more stenciling that I added behind the shells, I used the negative from a Tim Holtz Wildflower die to add some 'seaweed'.

Hope you've enjoyed seeing my art journal page and that you will feel inspired to join in our July challenge.


I can't wait to see what you make, happy creating!

Deb xo