Showing posts with label Sizzix. Show all posts

Monday, March 20, 2017

Mixed Media Tag Tutorial

Hi everyone, I'm Christina.

As most of you know I'm a Tim Holtz addict! One of the many products I have is the ever popular Sizzix die The Lost Zombie. I knew when I received this die that there would be high hopes for him. You can switch it up for any occasion.

For the March Challenge I decided to create a mixed media tag using The Lost Zombie die.


Meet Rusty. He's got big plans! Tracking through the twigs, with a present and balloons. It's a bit windy, but it's not stopping him form enjoying the celebration.


After dressing the zombie, apply distress ink Walnut Stain around the edges for a tattered look.


Apply a thin coat of gesso to a #8 manilla tag. Let it air dry. It doesn't take long because there's not a lot of gesso on the tag.


Now the fun part begins....using any color of distress crayon, I used (Abandoned Coral and Vintage Photo) start colouring in random areas on the tag and blend with your fingers till the tag is covered. Hint: if the color is too dark, you can always buff it out with a baby wipe. Next place stencil (Dot Fade) on top and apply texture paste over in random areas of tag. Let it air dry.


Apply distress ink Broken China on top of Dot Fade, to give a hint of color.


For the zombie's (aka - Rusty) accessories I used Stampers Anonymous CraZy ThiNgs and the coordinating sizzix Framelits die, then coloured with distress crayons in Abandoned Coral, Feathered Peacock and Mermaid Lagoon.


This is one of my favourite dies - Sizzix thinlits die Twisted. It was used for the grass. 


The saying - Eat More Cake - is from the Stampers Anonymous - Handwritten Sentiments. I really enjoy playing with this set, because of the expressive lines.


Notice the brush strokes from colouring - it gives an effect of woodgrain in the background. It's pretty cool right?!

I hope you enjoyed my tutorial and if you want further inspiration check out the other talented design team members projects on this blog.

We want to see your creations for the March challenge: Birthday with a Twist Balloons. So, grab your tea/coffee, supplies out and use your imagination. The possibilities are endless!

Christina


Monday, February 27, 2017

Brave Heart

Hi everyone, I'm Christina

I read somewhere that you should do one thing a day that scares you. For me that would be stepping out of my comfort zone in the creative world. Sometimes I tell myself to breathe, get back to work and create something brave and new. So, I decided to alter Tim Holtz idea ology mini clipboard and make it my own.

So here we go.....!


Title: Brave Heart


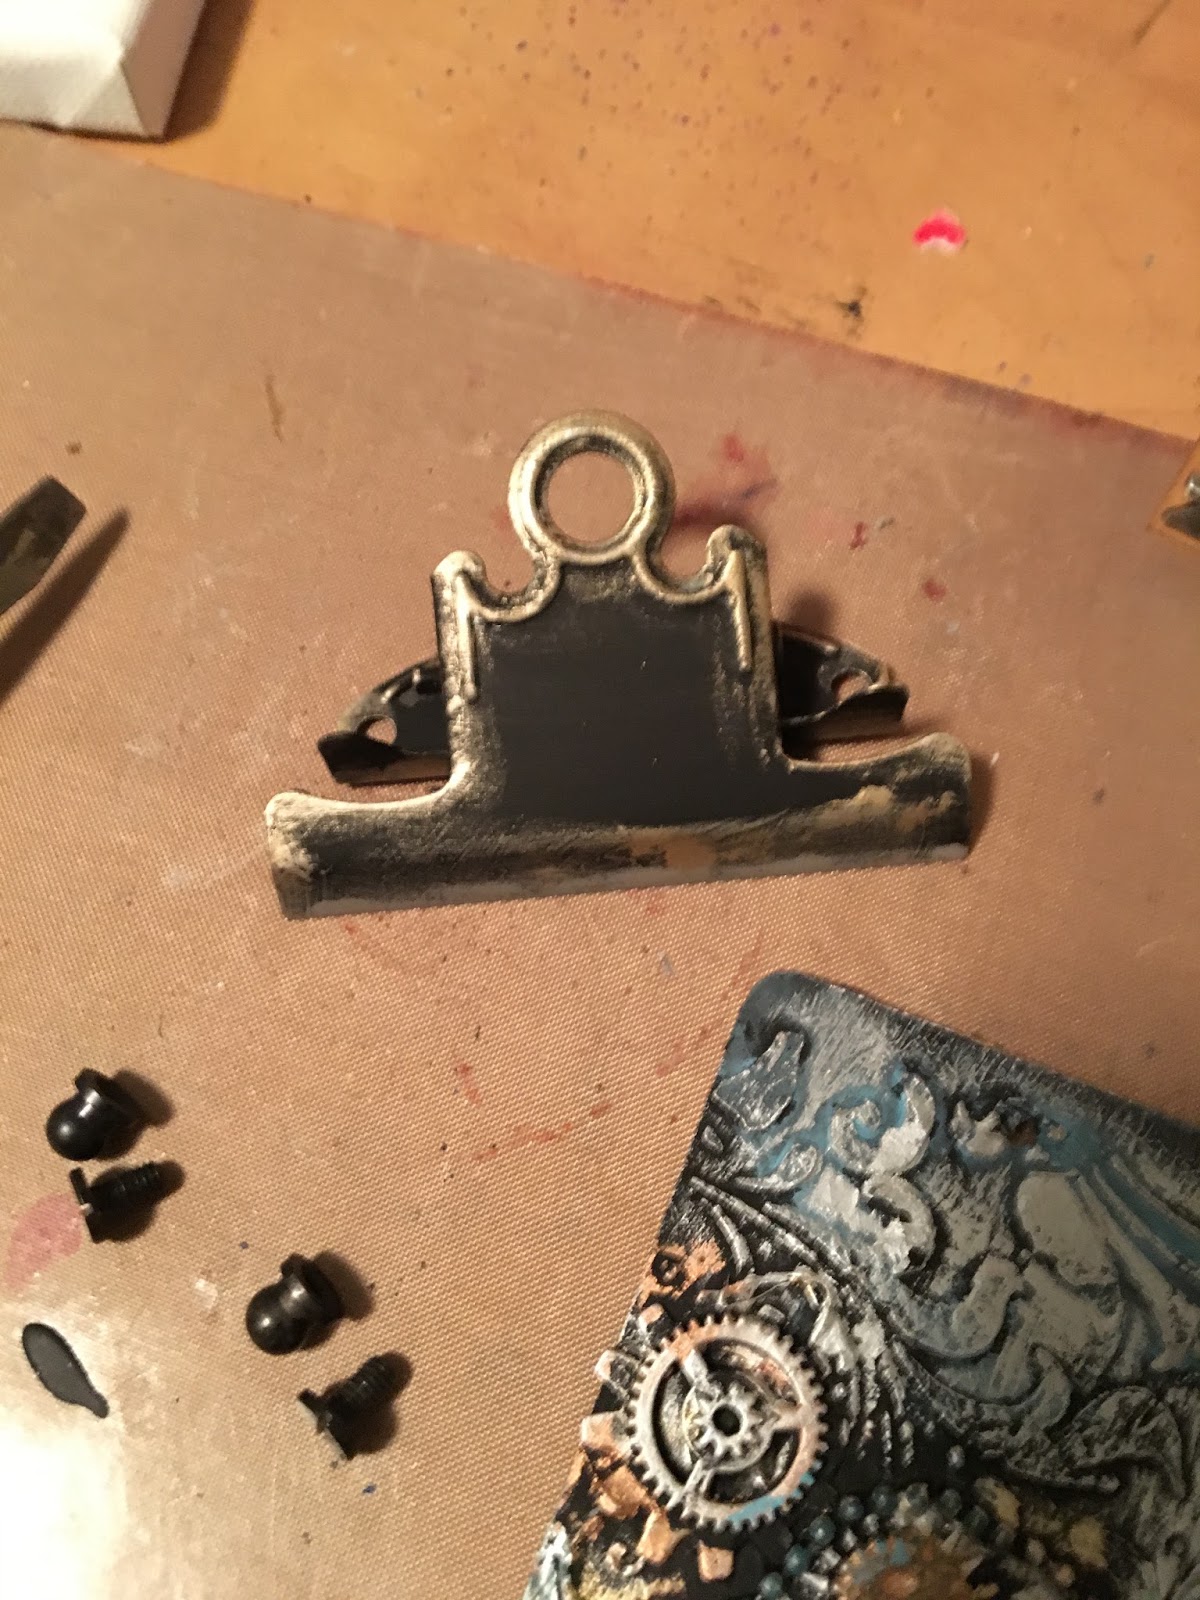
Start by taking apart the clipboard holder.


Apply black gesso to the clipboard, any brand will do.


Die cut and emboss the layered bee die out of chipboard from Tim Holtz Sizzix Alterations


Using the Tim Holtz Sizzix Alterations mixed media die, I used manilla paper from the #10 tag.


Apply Ranger texture paste through a variety of stencils, I used Tim Holtz Flourish, allow to dry or to speed dry use a heat tool. 


Once you have everything in place, the layered bee, gadgets/gears/beads etc. cover with a layer or two of black gesso. Heat set.


Now the fun begins......!
Using your finger, start rubbing in beeswax of various colors to give dimension and make your pieces come to life. I used Art (c) beeswax in gold/silver/bronze. For the more detailed parts I used a fine paint brush to add colour. 


Distress crayon, Smokey Sky was used to add more colour and give a vintage vibe to the piece. All you need to do is rub it in and a helpful tip....a little goes a long way.


Apply black gesso to the clipboard piece, heat set, then rub in a bit of the gold beeswax for a vintage effect


Here are two different techniques using the same layered bee die. As Tim Holtz would say this is definitely a "game changer"

Hope you enjoyed my tutorial and when you get a chance come on over and join the fun at our February challenge Love with a twist Wings. We can't wait to see what you create!

Christina


Wednesday, January 25, 2017

Happy New Year Mixed Media Card

Hello everyone and thanks for stopping by today.  Deb here and I've got a quick tutorial for you on how I made my Happy New Year's mixed media card for our current challenge, New with the twist of Clocks.


If you recall, this is what my card looked like:


and here's the quick and easy tutorial!

I started out my colouring a piece of 110 lb white cardstock with multiple colours of Distress inks in various shades of blue with some drips and drops of water added.  The Distress inks are water reactive which is going to come in handy, more on that soon!


Next I stenciled the 'City Scapes' skyline and reflection stencil from Stencil Girl Products onto my prepared cardstock with Ranger Matte Texture paste and set it aside to dry.

And this is where the water reactive properties of the Distress inks come into play, as the texture paste dries the water in the paste reacts with the Distress inks, drawing some of the colour into the white paste.  An effortless way to coordinate your texture paste stenciled images perfectly!


It wouldn't be New Year's Eve without a fireworks display so I stamped 'The Works' fireworks stamp from Emerald Creek Craft Supplies multiple times, embossing it first with white embossing powder and then offsetting the stamp slightly and embossing it with gold and silver embossing powders.  I made sure to stamp a few light gold and silver fireworks down into the watery reflection at the bottom of the card.

To incorporate the clocks twist into my card, I die cut a Tim Holtz Movers and Shapers Pocket Watch from heavy cardsotck and embossed it with Emerald Creek Craft Supplies Hammered Metal embossing powder.  The midnight clock face was a digital image I had in my stash, so I just printed it out onto white card and punched it out with a circular punch.


The Happy New Year sentiment was die cut with Tim Holtz's Alphanumeric dies, once from black card and once from white, and the letters offset slightly to add a white highlight behind the sentiment.


And that was it!  I cut some gold metallic scrapbook paper about 1/4" larger on all sides than the embossed card and mounted it onto a card blank made from black cardstock.   Everything was adhered together and the card was complete.


Thanks for stopping by and hope you have been inspired to enter our New with the twist of Clocks challenge, you still have a few days to enter!  Can't wait to see what you make to link up and as always, happy creating!

Deb xo

Sunday, January 15, 2017

The Adventure Begins - 2017

Hi everyone!

I'm Christina. Since 1994 I've been paper crafting. During the past 6 years, I've developed a huge passion for mixed media. Most of the techniques are from Tim Holtz. He's really good at sharing cool stuff, and yes I do have an abundance of his products, some of them are in my project.
This is my second design team and I'm so thrilled to be apart of this team. I look forward to sharing my creativity and inspiration with everyone.

This months challenge (January) theme is New with a Twist Clocks. I missed this challenge because I had a late arrival. So I decided to create a mixed media altered journal cover with the January theme.


mixed media altered journal

This is my first altered journal cover. I've been wanting to create this for a few years and finally decided it was time.


First you will need an old hardcover book. I used a book from my vampire phase (haha).
Randomly glue pieces of tissue paper on top of book cover.

Once all the pieces/finds are glued in place, cover with black gesso. Hint - you can also use a glue gun for dimension and texture, before applying the gesso -

Alcohol or baby wipes are used to buff out areas to show the tissue paper and the distress paint is rubbed around and on the pieces to give them hi light.

For a finishing touch, I rubbed acrylic paints -copper and gold, distress paints -Broken China, Brushed Pewter, Tattered Angels Glimmer mist- Coffee Shop, Perfect Pearls- Heirloom Gold on the Tim Holtz Sizzix Weathered Clock die, gears, game spinner, time piece, chain etc. to make them pop out.

I hope you enjoyed my tutorial on how fun it is to alter a journal. 
Also come over and join in the fun in the January challenge - New with a Twist Clocks


Have a great day,

Christina


Wednesday, December 21, 2016

Happy Ornaments Mixed Media Christmas Card

Ho Ho Ho everyone, thanks for stopping by at this busy time of the year.  Deb here today to share a mixed media Christmas card I made for our current Winter Holidays with the twist of adding Shimmer challenge, hope you will enjoy seeing it.


I started out with a stenciled background using Tim Holtz's Birch Trees stencil.  I lightly sprayed some Antique Linen Distress spray onto 110 lb white cardstock, then did a stencil monoprint of the birch trees with multiple shades of light brown and grey Distress inks.  After drying the monoprint, I lined the stencil up again and stenciled through it with Weathered Wood and Stormy Sky Distress inks, adding drips and drops of water as well.


To define the birch tree images further, I used a water soluble graphite pencil to outline the trees and softened the lines with a paint brush dipped into a bit of water.  As a finishing touch, I spattered the stenciled background with diluted white acrylic paint for a snowy feel (sorry, didn't get a picture of that step!).

Three ornaments from Tim Holtz's Festive Sketch stamp set were stamped onto Distress Mixed Media Heavystock with Wendy Vecchi Archival inks in Red Geranium, Forget-Me-Knot and Leaf Green and then coloured and shaded with multiple colours of Distress inks and a waterbrush.


The ornaments were then embossed with some Emerald Creek Craft Supplies Iridescent Shimmer embossing powder to bring the December twist of 'shimmer' into play and fussy cut.

To bring a bit more shimmer and shine to my card, I die cut the words 'happy holidays' with Tim Holtz's Holiday Words #2:Thin dies into some gold foil cardstock.


The edges of the stenciled background were distressed and inked with some Frayed Burlap Distress ink and the gold foil die cut was applied to the bottom.

A card blank was created from some kraft cardstock and the stenciled background adhered with some double sided tape.  More cardstock was coloured with several shades of green Distress inks and I die cut some greenery with Tim Holtz's Mini Holiday Greens dies (sorry, missed getting a picture of that step too!).  The greenery was adhered to the top of the card


and white gesso 'snow' was added here and there with a sprinkling of Clear Rock Candy Distress glitter for more sparkle.

The fussy cut ornaments were mounted onto some fun foam for dimension and hung from the greenery above with pieces of metallic gold embroidery floss.


And more white gesso sprinkled with Rock Candy Distress glitter was added to the tops of the ornaments.

I am ashamed to say that this was the first time I'd used the Holiday Words Thins dies but I do love that font!


Wish the shimmer would show up better in the pictures, this card really is very lovely in real life.  You can catch just a glimpse of it in this side on shot.


Thank you for taking the time to stop by today and I hope that you will be able to join in our December challenge.


I'd like to take this opportunity as well to wish you and yours a joyous holiday season and I will see you all again in 2017!


Hugs, Deb xo

Monday, November 14, 2016

Turn Turn Turn Art Journal Page

Hello everyone, thank you for stopping by!  Deb here today and since it is Monday that means it's time for a new art journal page.  I made my Turn Turn Turn art journal page to incorporate some of the metallic leaves I didn't use on my first project this month for our Autumn with the twist of Metallics challenge.


I've a few step out photos on how I made it, enjoy!

I started out with a single page from my art journal (which I have had to take apart since it was getting to thick to close, I can't stop adding embellishments!).  I stamped the page with Tim Holtz's new Pine background stamp and Tree Branch Archival ink and then coloured the page with Antique Linen and Frayed Burlap Distress stain.


The word TURN was stamped several times on the page with Ground Espresso Archival ink and I then spattered the whole page with diluted white, orange and brown acrylic paints.

I die cut the Bird Branch die from some crackled cardstock I had in my stash from another project.  I cut the bird off and saved him for a rainy day!


The branch was a little too pale for my design so I coloured it first with Ground Espresso Distress stain and then intensified the colours here and there with Walnut Stain and Vintage Photo Distress crayons.

The Weathered Clock was die cut from some chipboard packaging and embossed with Burnt Copper Leaves embossing powder.  Love this embossing powder!


And then the page was assembled.  I made a tag by painting a piece of cardstock with Frayed Burlap Distress paint and then running it through my printer to print the sentiment (the font is called Beyond Wonderland).


The tag shape was cut out and some oak leaves were punched from a remnant of Distress ink coloured cardstock with a couple of Recollections punches.  The edges of the tag were edged with some gold Decofoil.

The leaves are Ranger Foil tape mounted onto cardstock, die cut with the Layered Leaf


and Arbor dies and then coloured with alcohol inks.


Here's a close up of the Pine background and spatters, such an easy way to get some texture and interest on your background.


I hope that you've enjoyed seeing my Turn Turn Turn art journal page, I really enjoyed making it and was humming The Byrds song the entire time I was putting it together.


You still have plenty of time to enter our November challenge so hope you will head into your craft space and make something to link up.  I can't wait to see it, happy creating!

Deb xo