Showing posts with label Mixed Media Mojo. Show all posts

Wednesday, May 24, 2017

Still Celebrating A Wedding

It's Cathy here today to share another wedding celebration! Have you shared your creation yet? Don't forget to celebrate...with the wedding twist! Make sure you add your link on the original post HERE

This project I went fairly traditional! Not sure why, but I think it was due to this lovely couple from the TH Paper Dolls collection. I have never used 'people" before but have to say...I love these! so many ideas for them, I want to add people to everything!

I used Ranger Distress Paper, then inked it up with my Distress Oxides in Vintage Photo and Walnut Stain. I then blended on some Broken China and splattered it with water so I got some droplets showing on the blue. I gave it a quick shot with my heat tool and then used embossing ink through the TH stencil and embossed with Charred Gold Embossing Powder from Emerald Creek. I inked the chipboard quote pieces with the Broken China as well.

I dug through my Paper Dolls and found this adorable couple and they fit the theme just right! I coloured in the roses for the bride in red. I then embossed two heart charms with the Charred Gold, just the right touch to go with the quote.

And here is the completed project!


A close up of the bridal flowers. I love this couple and you could customize the coloured roses to go with the colours of the wedding you might be attending and giving this too.

You can see the gorgeous blue in the background and the splats I got from the water, and then that gorgeous melty goodness of the Charred Gold.

And you can't have an important event with out your little 4 legged family! :)

Thanks for stopping by and don't forget to share your creations with us :) 

Have a great day everyone!

Cathy

Monday, February 27, 2017

Brave Heart

Hi everyone, I'm Christina

I read somewhere that you should do one thing a day that scares you. For me that would be stepping out of my comfort zone in the creative world. Sometimes I tell myself to breathe, get back to work and create something brave and new. So, I decided to alter Tim Holtz idea ology mini clipboard and make it my own.

So here we go.....!


Title: Brave Heart


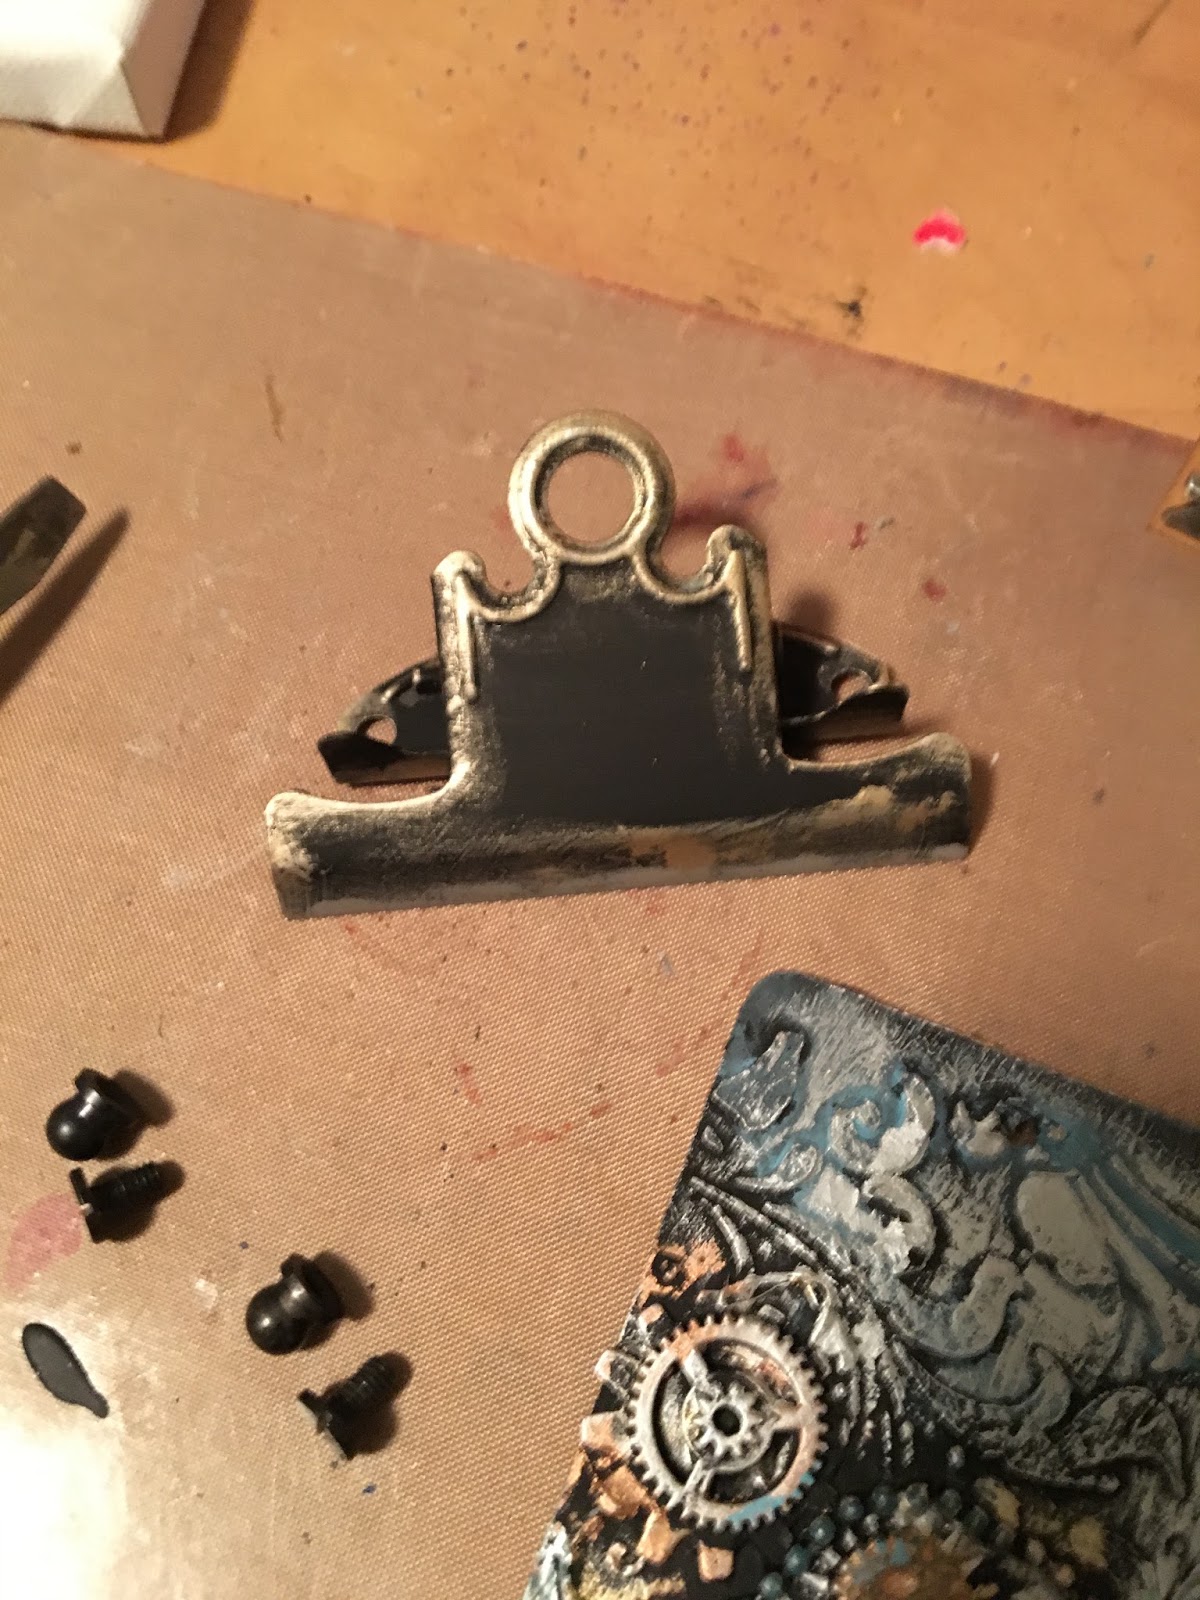
Start by taking apart the clipboard holder.


Apply black gesso to the clipboard, any brand will do.


Die cut and emboss the layered bee die out of chipboard from Tim Holtz Sizzix Alterations


Using the Tim Holtz Sizzix Alterations mixed media die, I used manilla paper from the #10 tag.


Apply Ranger texture paste through a variety of stencils, I used Tim Holtz Flourish, allow to dry or to speed dry use a heat tool. 


Once you have everything in place, the layered bee, gadgets/gears/beads etc. cover with a layer or two of black gesso. Heat set.


Now the fun begins......!
Using your finger, start rubbing in beeswax of various colors to give dimension and make your pieces come to life. I used Art (c) beeswax in gold/silver/bronze. For the more detailed parts I used a fine paint brush to add colour. 


Distress crayon, Smokey Sky was used to add more colour and give a vintage vibe to the piece. All you need to do is rub it in and a helpful tip....a little goes a long way.


Apply black gesso to the clipboard piece, heat set, then rub in a bit of the gold beeswax for a vintage effect


Here are two different techniques using the same layered bee die. As Tim Holtz would say this is definitely a "game changer"

Hope you enjoyed my tutorial and when you get a chance come on over and join the fun at our February challenge Love with a twist Wings. We can't wait to see what you create!

Christina


Wednesday, June 8, 2016

Queen Of Our Hearts Mixed Media Plaque

Hello and welcome!  Deb here for Mixed Media Wednesday at Mixed Media Mojo and today I have a tutorial for you on how I made this 'Queen Of Our Hearts' mixed media plaque.


In keeping with our June challenge theme of Fit For A Queen with the twist of adding Gems or Jewels, I made this mixed media plaque to gift to my sister-in-law for her birthday.  Read on to see how I made it.

I started out with a chipboard Automaton doll that I purchased at Paper Whimsy, she seemed sufficiently regal for the theme!  I painted the body and arms with quite gesso first,


and then painted her hands and face with Ceramcoat AC Flesh and her body and arms with Americana Avocado Dip acrylic paints.

I then stamped her arms and body with a script stamp and Jet Black Archival ink and heat embossed the stamping with fine line black embossing powder.


I resized and printed out one of the Beautiful Faces (sheet 326) from Paper Whimsy and glued it to the Automaton's head, trimming and sanding the edges of the face once the glue had dried.

Since every Queen needs a crown, I took a chipboard crown that I purchased at Michael's and gave it a coat of gold embossing powder.


Some Jambo Lace Tape was used to embellish the Queen's collar and cuffs and a flat back heart gem from my stash was chosen to cradle in her hands.

I further embellished the crown with a red flat back gem and a line of midnight blue embossing powder and adhered it to her head.


A small chipboard fishtail banner was painted with black acrylic paint, the sentiment 'Queen Of Our Hearts' was printed out on the computer and cut to size and glued onto the painted banner.

For the plaque backing, a piece of heavy chipboard packaging was cut 5 1/2" square and two Maya Road flourishes were adhered to it.  The entire piece was then given a coat of white gesso.


I then dripped, painted and smooshed various colours of Distress stains onto the gesso painted surface (Old Paper, Iced Spruce and Peeled Paint), diluting the stains with water and letting them drip and pool.

After drying the surface thoroughly, I then stenciled texture paste through Tim Holtz's Rays Layering stencil and while the texture paste was still wet, sprinkled on more of the gold embossing powder (click here to see Tim Holtz's tutorial on this technique).  After the texture paste had dried, I heat embossed the embossing powder and intensified the colours on the plaque with Distress crayons in Mustard Seed, Peeled Paint and Twisted Citron and added shadows and contrast with Vintage Photo and Walnut Stain.


My apologies as this is where I got on a roll and forgot to take any more in process pictures!  You can see the embossed rays in the photo above and I also ended up adding some small gold stars (star confetti from the Dollar Store) scattered here and there over the plaque.

The Queen was adhered to the chipboard background and the flat back heart gem was nestled in her hands.  Her head was surrounded with some flat back pearls after she had been adhered into place on the chipboard background.


The flourishes were given a coat of Distress Crazing collage medium and the tiny cracks were highlighted with some Vintage Photo Distress crayon.  I further enhanced the flourishes with an outline of Moss Green Distress marker that I softened with a water brush.

So that is my Queen Of Hearts mixed media plaque tutorial, I do hope that you have enjoyed it.


I also hope that you have been inspired to join in our June challenge, Fit For A Queen,


I can't wait to see what you make!  Happy creating,

Deb xo


Wednesday, February 17, 2016

Sew Special Tag Accordion Book

Hello, Deb Riddell here today with my first post as a member of the Mixed Media Mojo design team!
I live in British Columbia, Canada on a small acreage with my hubbie and our rescue dogs who are much better known as our kids.  I started on my creative journey as a decorative and water colour painter and then branched out into creating home decor and decorative items after discovering the world of folk and primitive art.  From there it was a short hop to mixed media which is my current passion (and dare I say obsession!) and I am so happy to be able to share some of my work with you here at Mixed Media Mojo.

I recently made a little tag accordion book from hang tags and thought I'd share a tutorial with you today.  The tag book was made for a sweet blogging friend who very generously gifted me with a whole bunch of mixed media supplies she was destashing.  I made the accordion book using some of the supplies that she gave me and since she is a wonderful seamstress, I made it with somewhat of a sewing theme.
I made my book from five #8 hang tags, but you could use as many tags as you wanted or any size of tag that you have handy.
I then chose five scrapbook papers from the assortment my friend had given me to cover the tags front and back.
There are papers from Graphic45, BoBunny and 7 Gypsies here, some of the others weren't marked though so not sure what designers they are from.

I cut the scrapbook paper so that I had about an 1/8" reveal on all sides of the tag and aged the hang tags and edges of the paper with some Vintage Photo Distress ink before adhering the scrapbook papers to the front and back of the tags.
I then took some Tim Holtz Tissue Tape (Symphony) and attached the tags together edge to edge.
You could also use washi tape to attach the tags or make a hinge out of some scrap cardstock.  I like the look of the tissue tape over top of the scrapbook papers but if you didn't want to see it, you could attach your tags to each with the tape BEFORE applying the decorative papers.  I also punched the hole in the top of my tags so I could add some yarn but you can leave the holes covered if you didn't want to add the yarn embellishment.

And then it's time to embellish each page.  I made sure to alternate any dimensional embellishments so that the book would close easier.
To close the book, I punched a hole through the end tag and used a length of the yarn to tie it closed.  In making this book I used a combination of sewing themed stamps and die cuts and an assortment of embellishments and stamps that my friend had sent me.
Hope you've enjoyed the tutorial, the tag accordion books make up quickly and are a lot of fun.  It would be a great way to display a tag series or a group of tags made to celebrate a season or holiday.

Thanks for stopping by today and hope that you will check out our February challenge:
and come join in the fun!  Happy creating,

Deb xo

Monday, August 3, 2015

Journaling - A New Creative Path

Last week end I had the utmost pleasure in taking four classes from Dyan Reaveley at my local scrapbook store in Milwaukee, WI.  By local, it is an hour and 15 minutes away from where I live.  I want to share with you one project that I have completed from the class.

I challenged a fellow classmate (we are attending another class on August 15 at the same store) that we needed to have done journaling on at least one page we created in class.  I am happy to say I am working on my third page.

We worked with both Dylusion Inks and Paints.  I have on order a set of the paints and keep thinking I really need those inks but I struggle, I am basically a card maker.  Should I or shouldn't I?  Do you want to know the reason I bought my paints is because I ate a Dove chocolate and on the inside of the wrapper it said, buy something extravagant - so I bought the entire set of paints.

The page I am sharing with you today is done with the paints.  We made our background with a brayer.  We then used a masked and rubbed black paint around the mask leaving parts of the background showing.  I chose to use her flower.


As you can see I did some very simple doodling.  I did white dashes around the outside of each flower and a tiny circle at the end of each petal.  Inside the flower I drew a checkerboard line and colored in parts of it.  The center of each flower is stamped.  I chose to use a stamped sentiment on white to pick up the white that is showing in each flower.  Big dots were punched out of green painted paper and added to the journal page.


I kept my doodling to a minimum.  I did not want to chance ruining it.  I also used a stamped saying instead of hand writing a message.  I promise I will be more adventurous in my journaling in the future.

If you ever get a chance to take a class from Dyan, do - she is so much fun and you learn so much.

Wednesday, November 26, 2014

Thanksgiving Place Cards.

Hello again, Niki here aka Pawsitively Creative. I wanted to share a tradition in my family with you all today. This also goes with our challenge this month at Mixed Media Mojo-the theme is THANKS. You still have time to enter!

Every Thanksgiving my Grandma and I make name cards for everyone that is coming to Thanksgiving dinner. My Grandma is a proud 87 years young and she can't craft like she used to so I made these for her this year, with her input of course. Someone has to be the boss right? :) Unfortunately we won't be together for Thanksgiving, I just wanted to keep our tradition alive and well. We all love our traditions right? Here is how I made these. 

I started by painting my heavy chipboard piece with Silks Spiced Pumpkin (love the Silks!). I edged the sides with black Archival ink. Make sure to paint the back as well! 

While that was drying I used some white cardstock and stamped my Give Thanks image with embossing ink. I then brushed Luminarts Primary Elements Sunflower onto the embossed image (new technique?). I had to use what I had on hand because I don't have any gold embossing powder. The results were just what I was going for. Yippee!


Using a small paintbrush I curled the edges of the stamped piece to help give dimension. 

I then added a brown curly "twig", a small piece of wheat, and two leaves. I used dimensional dots to add the leaves. 

The chalkboard sticker was added last. This is where the names of the guests will be. I used a chalkboard pen to write my Grandmas name. I didn't finish the rest of the writing because I don't know the names of everyone going. But luckily my Mom said she would write their names when she got to my Grandmas house and my Mom has gorgeous handwriting! Winning!

Thank you for stopping by and Happy Thanksgiving!

 What are you thankful for? I am thankful for the opportunity to share my art with you all and to have a warm, safe home that I can go to everyday. I am thankful for my amazing husband and my two lovely/lively dogs-Nanook and Jaz. 

Carpe Diem! ~Niki


Wednesday, November 19, 2014

Need a Simple Last Minute Thank-you Card?

Hi!

Happy Wednesday!

It's Kim here today with a little "Thank you" idea to make whenever you need a special card.


This simple card can be customized with your favorite colors and sentiment. I used a Tim Holtz Butterfly die to make a card. This die comes with a matching embossing folder to add the details and extra color. But, you could use any die you have on hand or even punches. Just do two or three layers and stack them up! It really makes it POP when it is not all flat.

The "Thanks" sentiment and mini leaves and berries are from the Falling into Autumn set by Newton's Nook. The frame stamp around the sentiment is Unity. The background and butterfly were colored with Distress Ink and Paints. The cardstock is Core'dinations.

Thanks for stopping by today! Have a safe and Happy Thanksgiving if it is a Holiday for you! It is getting so close and everything is getting so busy! If you find a moment to make a project we would LOVE to have you link up in our Challenge this month, the theme is use "Thanks" in some fun way!

Have a great day!
~kim

Wednesday, October 15, 2014

DIY Fabric 3D Pumpkin

Hello y'all! Niki here (aka Pawsitively Creative) on the blog today. I wanted to share a how to on making my fabric 3D(ish) pumpkin. This is an easy way to add dimension to your project. Grap a Pumpkin Spice Latte and enjoy!


I started out by drawing a pumpkin shape that I could use as a template. I used the very back cardboard piece from a set of cardstock papers I bought awhile ago. I traced the template and cut out my pumpkin. 

Then I grabbed my gingham type fabric and glued down the bottom edge, and part of the sides using Tombow Multi liquid glue. Make sure to glue the fabric to the back of the pumpkin. 

Now this is the fun, sticky and messy part. Grab some cotton balls and start filling your pumpkin. I had glue stuck to my fingers so this was a bit messy but fun. As you add your cotton balls glue the edges of the fabric as needed. 

When you have your pumpkin stuffed to your specifications you can close the very top and add some string to represent the ridges in your pumpkin. I used hemp that I colored black. Then my baby girl, Raj (German shepherd) helped me pick out a stick from our backyard that was used as the stem of the pumpkin. 

Pick a spot on your project and glue your pumpkin down (I used E6000). Add your stem and now you have a fabric 3D pumpkin! Easy right?
Happy Halloween!

Remember to have fun and enter our October Halloween/Fall use Fabric challenge HERE at Mixed Media Mojo!

Happy crafting and Carpe Diem!