Showing posts with label craft tutorial. Show all posts

Monday, April 3, 2017

Spring tag tutorial

Hello everyone and thanks for stopping by today.
Ann here and I've got a quick tutorial for you on how I made my tag for our current challenge, Spring with the added twist of Showers. Enjoy!


This is what my project looked like:

Step 1 : Apply a layer of gesso. Let it's dry. Simply scribble various colors of distress crayons directly on the tag and smudge the colors by rubbing with my fingers to blend.

Step2 : I using a palette knife and Golden's Molding Paste to apply a stenciled design on the tag to form a rose image.

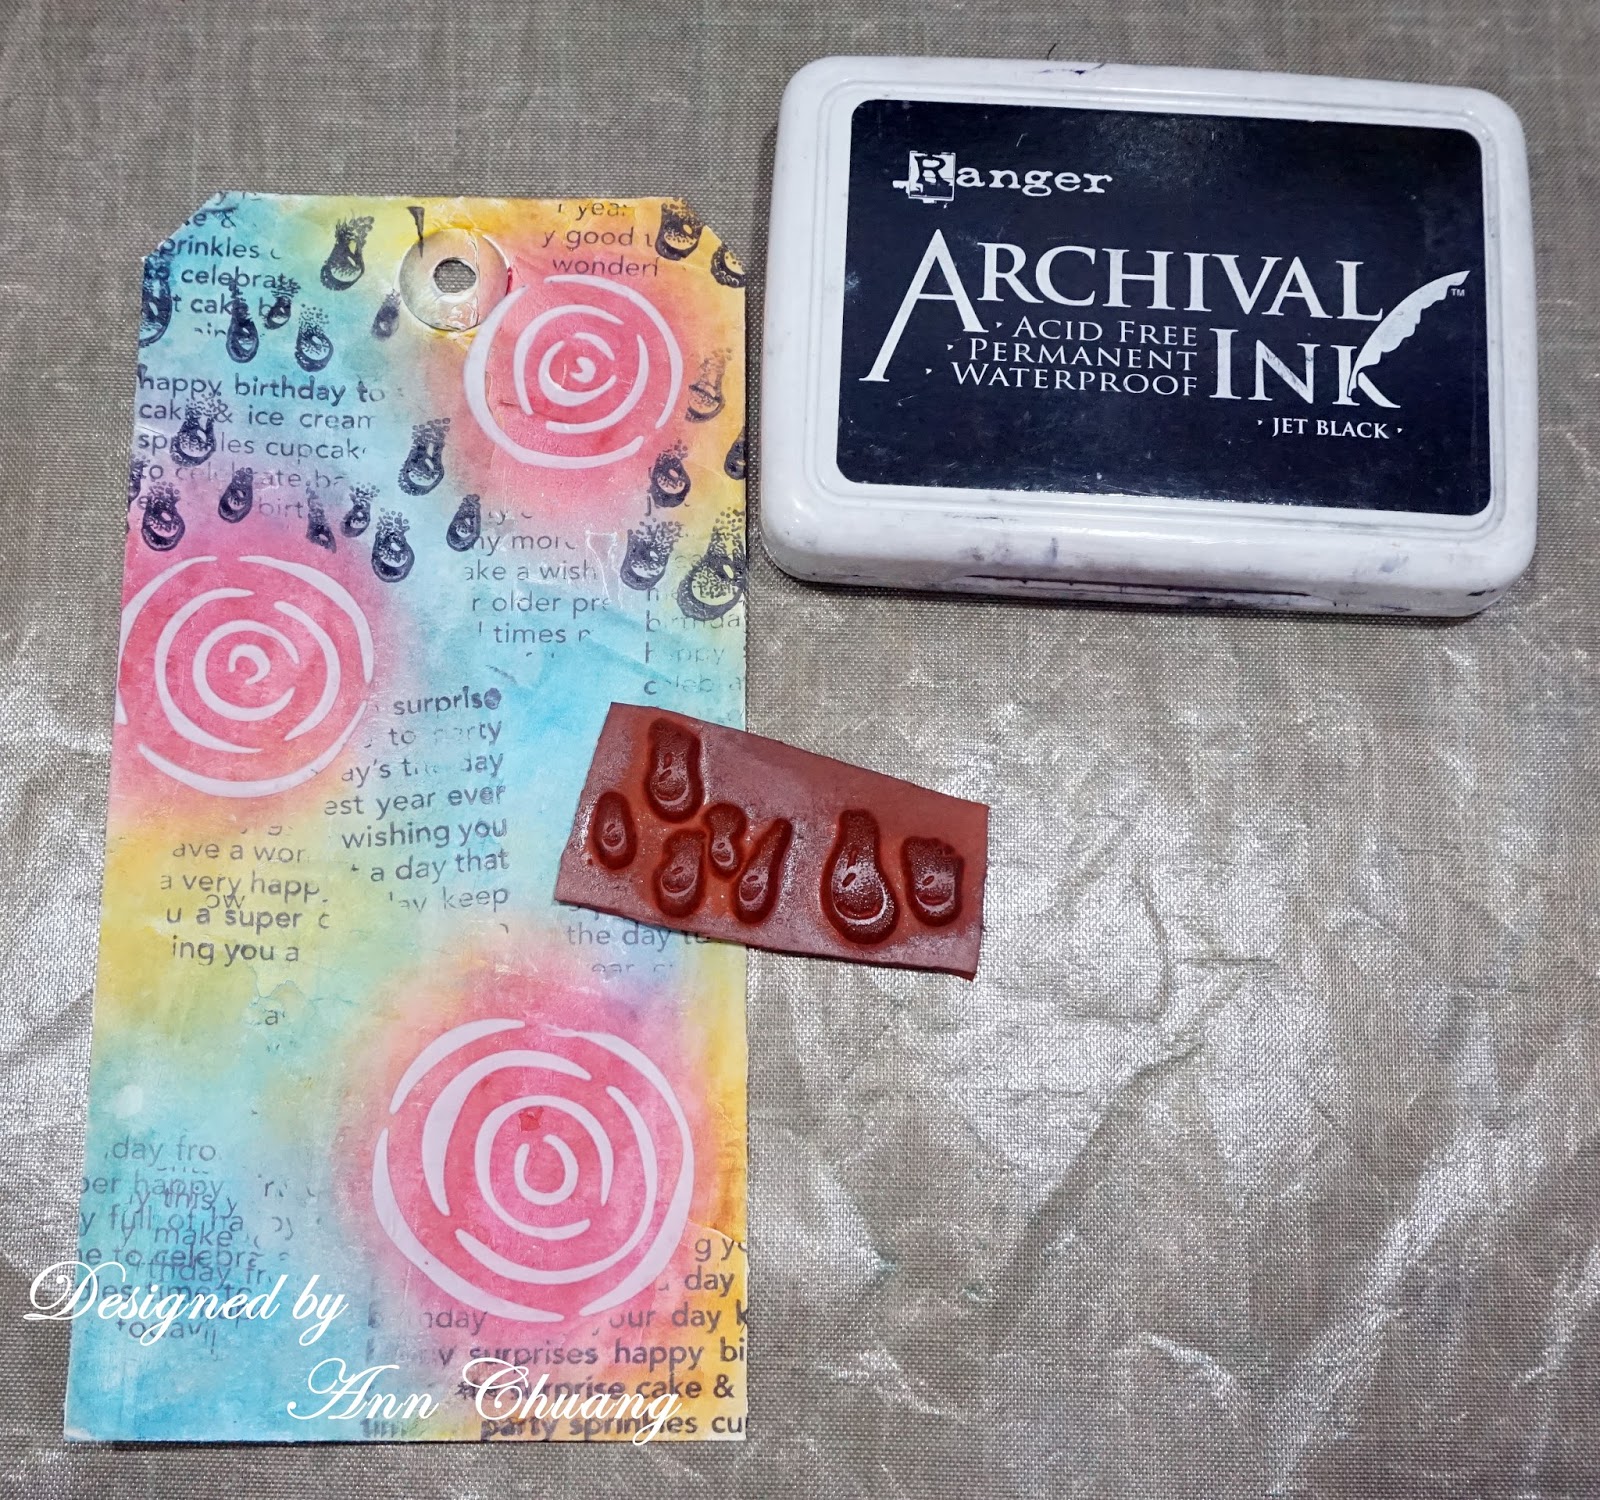
Step 3 : Using MFT's "HB Background", stamping randomly.

Step 4 : Stamping the "Water Effects" on the top one-third of the tag.

Step 5 : Die-cutting the Sizzix's "Wildflowers" from black card stock.

Step 6 : Wrapping string around the bottom of tag numerous times and glue the sentiment on it.

And this is the completed tag. I hope you like it!

Thanks so much for stopping by and hope this inspires you to join in our April Challenge. Can't wait to see what you make to link up and as always, happy creating!

Hugs & Love


Ann

Monday, February 20, 2017

Mixed Media Framed Art tutorial

Hello everyone and thanks for stopping by today. Ann here and I've got a quick tutorial for you on how I made my Mixed Media Framed Art for our current challenge, Love with the added twist of Wings. Enjoy!

If you recall, this is what my project looked like:


To get started, I placed a few small dollops of acrylic paint onto the craft sheet, then use the brayer to gently spread out the paint. When the paint has been spread out, gently "walk" the brayer across different parts of the the panel. Repeat the above process using different colors. When it dry, I die-cut the lower left corner and the upper right corner and stamping randomly.


I punched out several hearts, glued them together, then smudged the paint with my finger. Die cutting feather, painting the die cut with Distress Paint.


I'm featuring two of my new dies from Spellbinder, designed by Seth Apter. I just love these dies called Drip Drop and Robo Rings. I've used the acrylic paints to colour the die cut images and let it dry. I applied a layer of crackle paint on the Drip Drop. Stamping the Robo Rings.


Here are some close ups of the project.


And this is the completed project - I am really happy with how it came out. I hope you like it!


Thanks so much for stopping by and  hope this inspires you to join in our February Challenge, you still have a few days to enter! Can't wait to see what you make to link up and as always, happy creating!

Hugs & Love
Ann

Wednesday, August 17, 2016

Fruits Of Our Labours Mixed Media Canvas

Hello and welcome, Deb here today for Mixed Media Wednesday to share a project with you that was inspired by our August challenge, Harvest with the twist of adding Fruit.


I have a quick tutorial on how I made my 'Fruits Of Our Labours' mixed media canvas, hope you will enjoy it.

I started out with a 5" x 7" flat artists canvas and added die cut letters to spell out my words.  I have A LOT of die cut letters from previous projects that I hoard keep in my stash so I used them and didn't worry about what material or colour they'd been die cut from as I intended to cover everything with gesso.  I layered three of each letter together for some dimension and adhered them to the canvas.


The wide serif letters are from Tim Holtz's Boardwalk die and the narrow sans serif letters are from his Alphanumeric dies.  I gave the whole canvas a coat of gesso and let it dry.

Sprays and drips with Distress spray stain in shades of yellow and orange came next along with some spritzes of water to blend the colours.


After the stain had dried, I sealed the whole canvas with Distress Matte collage medium and then intensified the colours by scribbling with Distress crayons and blending with my fingers.  I added some shading to the lettering with shades of brown Distress crayons and then gave each letter a dusting of Perfect Pearls.  The edges of the canvas were also shaded with brown Distress crayons.

Stamping came next, I used a variety of script and mixed media stamps from my stash and stamped them onto the canvas with Black Soot Distress Archival ink.


I still felt I needed some interest on my background so spattered the canvas with white and then black thinned acrylic paint, masking off the lettering before doing so.  Here's a close up picture of the spattered and stamped background.


I then fussy cut some vintage peach and apple images from my stash (courtesy of Magic Moonlit Studio) and adhered some of them to the background.  I sealed the background images with Distress Matte collage medium and then used a Black Soot Distress marker to add some shading.


The two foreground images were mounted onto black fun foam and adhered over top to add a bit more dimension to my canvas.


I love the addition of the Perfect Pearls to the lettering, I must remember to use it more often!


Hope you have enjoyed my quick little tutorial, this is a great way to make use of those hoarded surplus die cut letters you have in your stash!


I also hope it has inspired you to join in our August challenge, I can't wait to see what you create.


Thanks again for stopping by today and happy creating!

Deb xo

Wednesday, March 9, 2016

Life's An Advenure

Hello, I hope everyone is well, and finding lots of happy time to craft!

Today I thought would share how I made my Spring Tree for the Springtime challenge with a twist of watercolours.

I stamped the lovely "Life's an Adventure" using black Archical ink (it is waterproof) onto watercolour paper and used Aqua Marker pens to colour her. I did not use the pens directly onto the paper, instead I dabbed a little into my palette and added a teeny bit of water. I then added some pink flowersoft to accentuate her hair band.

I die cut a lot of small flowers, and then used a coloured pencil to edge them in a slightly darker shade. I used Liquid Pearls in Buttercup to make the centre of the flower. I bent the flowers up a little to try and make them look more realistic and not so flat.

I then Moulded green plasticine into a small hill shape, and scratched it up to look like grass.

When you have decided the size you would like your tree to be cut a length of 2mm thick brown wire to make the trunk and firmly place it in the centre of the hill.

Cut shorter lengths of 1mm thick brown wire and very tightly twist it around the trunk where you would like your branches to be.


Glue the flowers onto the branches, I used pva glue. I glued my swing girl very carefully onto the tree. Where she seems to be very happy!

I hope that I may have inspired you a little....

Don't forget to add your Springtime project into this months Challenge